Showing posts with label fabric. Show all posts

Thursday, 28 February 2013

Traditional Thursday: making your own bunting

Today we're going all traditional with a post about beautiful bunting! It's a decoration that's been around for years and years but the beauty of it is each one is different. Adding bunting to your wall is one of the simplest, cheapest and easiest ways you can brighten up a room without needing to pick up a paintbrush or start hanging wallpaper. If you're not the kind of person who wants an 'in your face' bright room, you can use bunting to add a little touch of colour. It really is so versatile and can be used in any room and doesn't need to be confined just to the walls - you can hang it from the top of your curtain rail, from shelves, above a mirror, off the mantelpiece or why not try making a miniature version to hang off a picture frame?


You will need:
- Decorative paper (ours is from Hobbycraft)
- Or sections of old fabric, offcuts of wallpaper, pieces of old books or any other material you like!
- Ribbon (ours was also from Hobbycraft)
- Mini pegs if you're going to peg them, otherwise you can sew or glue them on


Step one: Cut your fabric in to the shape you want, traditionally bunting is triangular but you can always choose a different shape!

Step two: Sew, glue or peg the pieces along the ribbon. You can use as many or as few as you like depending how long you want your bunting to be.

Step three: Why not try adding embellishments? Gems, sequins, different material cut in to cute shapes like hearts - the possibilities are endless!


How cute is this mini bunting?!
You could theme your bunting, for example if you were getting married why not add your names or Mr and Mrs across the bunting? Or make a 'happy birthday' themed string instead of a banner?


How cute are these examples of kitchens and dining areas decorated using bunting?


And these bedrooms are simply amazing! On the left they've made Winnie the Pooh themed bunting for a child's room - so cute!
(Last two images all from www.weheartit.com)

H & E x

Monday, 11 February 2013

Made it Monday: fabric letters

This is probably one of the simplest craft ideas ever and yet it leaves you with something beautiful you can display anywhere that's completely unique to you! These fabric covered letters are really ace and what makes them even better is you can choose the letter, the fabric and the decorations so no two will ever be the same (unless you want them to be of course!)


You will need:
- Cardboard letter (we got ours from Hobbycraft for £1 each)
- Glue
- Fabric of your choice (you can pick just one or loads, we got ours from our local haberdashery but you could use anything you like)
- Emma also used some patterned paper from a Hobbycraft book
- Sequins/embellishments (optional!)


Step one: Cut your fabric to fit and use the glue to stick in on to your letter.

Step two: Wait for it to dry (this is the hard part! It's difficult waiting when you want to get creative with the embellishments).

Step three: If you want to add anything to it, simply come up with the design and get sticking.

Step four: Display it proudly!


These are so fun to make and could even be a way to keep the kids occupied on a rainy day (although perhaps a big kid should take charge of cutting the fabric!) To make yours a bit different, why not try a different material? You could use off-cuts of wallpaper, patterned card/paper or why not cut up some old clothes you don't wear any more and use them? Or for children why not let them pick their favourite pages from a comic or magazine or add pictures of their favourite cartoon characters on to the letter?

H & E x

Sunday, 27 January 2013

Snazzy Sunday: tiedye t-shirts

Emma's been making tiedye t-shirts to sell in the shop and the customers can't get enough of them so today we thought we'd show you how to make your very own.
Each one is completely individual so you'll never see anyone wearing the exactly the same t-shirt as you!


You will need:
- A plain white t-shirt (we got ours from Primark but any one will do!)
- Elastic bands
- Rubber gloves
- Food bags
- Dylon fabric dye in your chosen colour (available at loads of places including supermarkets and Wilkinson)
- A plastic bowl (washing up size)


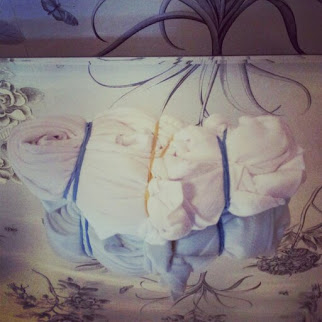
Step one: Lay the t-shirt out flat and pinch the middle of it, twisting the material in to the centre.

Step two: Keep going until the t-shirt is in a bundle like the picture below.

Step three: tie as many elastic bands around the t-shirt as you like, we chose three but you can do more or less if you prefer.


Step four: Put the dye in a bowl half full of warm water and drop the t-shirt in.

Step five: Leave to soak for at least half an hour. Then using your rubber gloves put the t-shirt in to the plastic food bag.

Step six: Leave the bag in an airing cupboard overnight and then the next day you can take it out, take the elastic bands off and rinse the rest of the dye off with cold water until it runs clear.

Step seven: Hang it up and once it's dry it's ready to wear!

Harriet wearing hers made using ocean blue dye!

For the first few washes make sure you're only cleaning it in cold water and only wash it occasionally to make sure the colour doesn't fade!


H & E x