Showing posts with label creative. Show all posts

Thursday, 14 February 2013

Thirsty Thursday: decorate your own mug

There's nothing better than sipping your favourite drink out of a pretty mug or cup! Although we're obviously big fans of a beautiful vintage cup we decided we wanted to get a little creative and decorate our own. It's ridiculously simple and takes about five minutes (plus the time they're in the oven for!) - why not have a go at your own? You can make the design as simple or as complicated as you like.


You will need:
- A mug or cup of your choice (we got our from Wilkinson)
- Permanent markers
- Paper (optional)
- An oven


Step one - if you want to practice your design before committing to it, cut out a section of paper the same size as the mug so you have an idea how big/small you can make your design.

Step two - use your permanent markers to draw out the design on the mug.

Step three - put the finished mug in your oven on a low heat for half an hour

Step four - take it out, wait for it to cool and then make your friends envious every time you have a cuppa!


Harriet's mugs - I love Hello Kitty so I decided to draw my initial with a Hello Kitty red bow on it! And then I had a look at Alice in Wonderland 'Drink Me' pictures on the internet and adapted one of the designs for my second mug!


Emma's mugs - I love heart designs and wanted mine to be cute and a fairly simple design so I used dots to create a heart effect and some extra dots on the handle too! Then I used dots again on the mug to create an E! I just used the very end of the permanent marker to create a lighter red effect.


These are so simple to do it's hard to believe everyone doesn't have their own personalised mug! We've made ours for our own enjoyment but if a loved one's got a special occasion coming up why not make them their very own mug! (Or if you know a couple what about Mr and Mrs mugs?) If you've got children it would be lovely to let them draw on a mug and then as they grow you'll always have that keepsake! Instead of keeping their drawings on the fridge why not look at them every time you have a drink!


H & E x

Tuesday, 29 January 2013

Thoughtful Tuesday: heart cards

There's nothing better than receiving a cute card from a loved one, especially if you know they've spent some time making it with their very own hands! These really cute little cards which can be used for any occasion (and with Valentine's Day just two weeks ago what better excuse to make some?!) are available in the shop but now we're going to show you how to make some for yourself!


You will need:
- Pack of plain white card (we got ours from The Works)
- PVA glue
- An old book
- Scissors
- String


Step one: Fold your card in half.

Step two: Cut a heart shape out of one of the pages of the book.

Step three: Stick it down using the PVA glue and leave to dry.


For a 3D heart: use five different sized hearts. Put them all together and sew down the middle of the heart or use the PVA glue to stick down the middle.

When completely dry, you can then fold them out to create the 3D effect!

For a different effect, you could always use wallpaper, fabric or sheet music - or why not give it a go with any other material you like!

H & E x

Sunday, 27 January 2013

Snazzy Sunday: tiedye t-shirts

Emma's been making tiedye t-shirts to sell in the shop and the customers can't get enough of them so today we thought we'd show you how to make your very own.
Each one is completely individual so you'll never see anyone wearing the exactly the same t-shirt as you!


You will need:
- A plain white t-shirt (we got ours from Primark but any one will do!)
- Elastic bands
- Rubber gloves
- Food bags
- Dylon fabric dye in your chosen colour (available at loads of places including supermarkets and Wilkinson)
- A plastic bowl (washing up size)


Step one: Lay the t-shirt out flat and pinch the middle of it, twisting the material in to the centre.

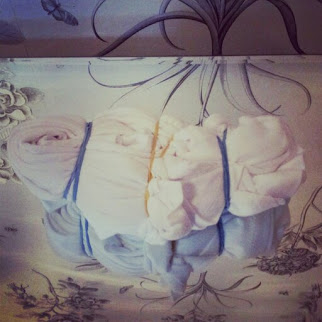
Step two: Keep going until the t-shirt is in a bundle like the picture below.

Step three: tie as many elastic bands around the t-shirt as you like, we chose three but you can do more or less if you prefer.


Step four: Put the dye in a bowl half full of warm water and drop the t-shirt in.

Step five: Leave to soak for at least half an hour. Then using your rubber gloves put the t-shirt in to the plastic food bag.

Step six: Leave the bag in an airing cupboard overnight and then the next day you can take it out, take the elastic bands off and rinse the rest of the dye off with cold water until it runs clear.

Step seven: Hang it up and once it's dry it's ready to wear!

Harriet wearing hers made using ocean blue dye!

For the first few washes make sure you're only cleaning it in cold water and only wash it occasionally to make sure the colour doesn't fade!


H & E x